Need to convert your 3D model's measurement units? This step-by-step tutorial explains how to change units in STEP (.stp, .step) and IGES (.igs, .iges) files using Autoconverter software. Whether you're switching from inches to millimeters or any other unit, this guide ensures your 3D CAD files stay compatible with your project requirements.
How to Change 3D Model Units in STEP and IGES Files: Step-by-Step Guide
📥 Install Autoconverter Software
- Download Autoconverter installer from the product page.
- Run the installer and follow the on-screen instructions.
- After installation, access Autoconverter from the Windows Start menu.
🚀 Launch Autoconverter
- Open Autoconverter via the Start menu or by double-clicking the executable in the %ProgramFiles%\Automapki\Autoconverter folder.
- You will see the interface with a file menu, ribbon bar, property manager, and 3D model viewer.
📂 Import Your STEP or IGES File
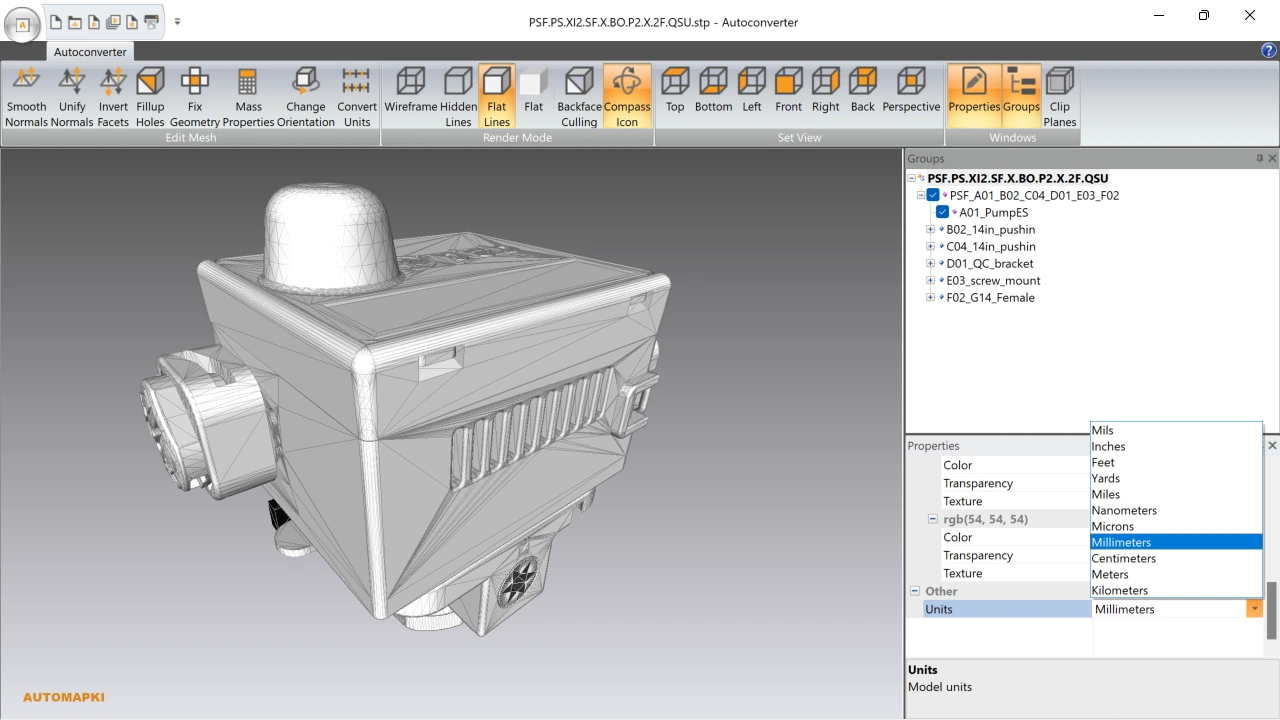
📏 Change Model Units
- Locate the Properties Manager on the right side of the interface.
- Find the Units setting in the properties list (e.g., inches, millimeters, meters).
- Select your desired unit from the dropdown menu to apply the change.
📤 Export Updated 3D Model
FAQ: What Units Can I Convert My 3D Model To?
Autoconverter supports various units including millimeters (mm), centimeters (cm), meters (m), inches (in), and feet (ft). You can choose the appropriate unit from the dropdown in the Units item of the properties panel.
Change Units in STEP or IGES Files: Final Thoughts
Using Autoconverter, it's simple to update and convert 3D model units in STEP and IGES files. Whether you're standardizing for manufacturing, 3D printing, or software compatibility, these steps make it easy. Always review the final output to confirm accuracy.