Need to declutter your AutoCAD workspace or temporarily disable third-party tools? This tutorial walks you through how to unload Automesher Application menu in AutoCAD manually. By using AutoCAD's built-in MENULOAD command, you can remove the Automesher menu quickly and easily. Here's how:
How to Unload Automesher Menu in AutoCAD: Step-by-Step Guide
Open AutoCAD and Execute MENULOAD Command:
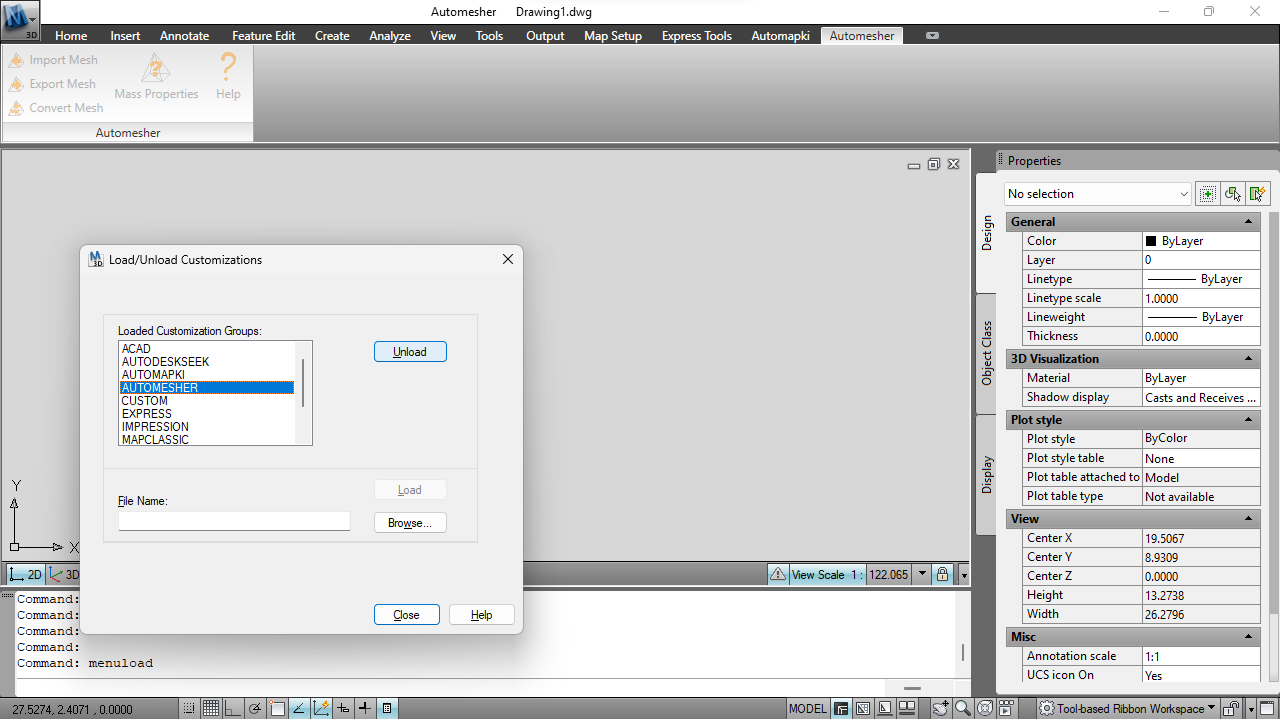
Launch AutoCAD and type MENULOAD into the command line. Press Enter to bring up the Menu Customization dialog.
Locate Automesher Application Menu:
In the menu load window, scroll through the list of loaded customization files. Look for AUTOMESHER in the list of available menus.
Select and Unload Menu:
Click on the AUTOMESHER menu to select it, then hit the Unload button. This removes it from your current AutoCAD session.
Restart AutoCAD to Confirm Changes:
Exit AutoCAD and relaunch the application. This ensures that the Automesher menu stays unloaded for future sessions, keeping your interface clean and optimized.
Unloading Automesher Menu: Final Thoughts
That's it! You have now successfully unloaded the Automesher menu from AutoCAD. This can help streamline your workspace and improve focus during specific projects. If you ever need to bring the Automesher menu back, simply use the MENULOAD command again to reload it. For more AutoCAD tips and 3D conversion solutions, be sure to check out our other tutorials.